
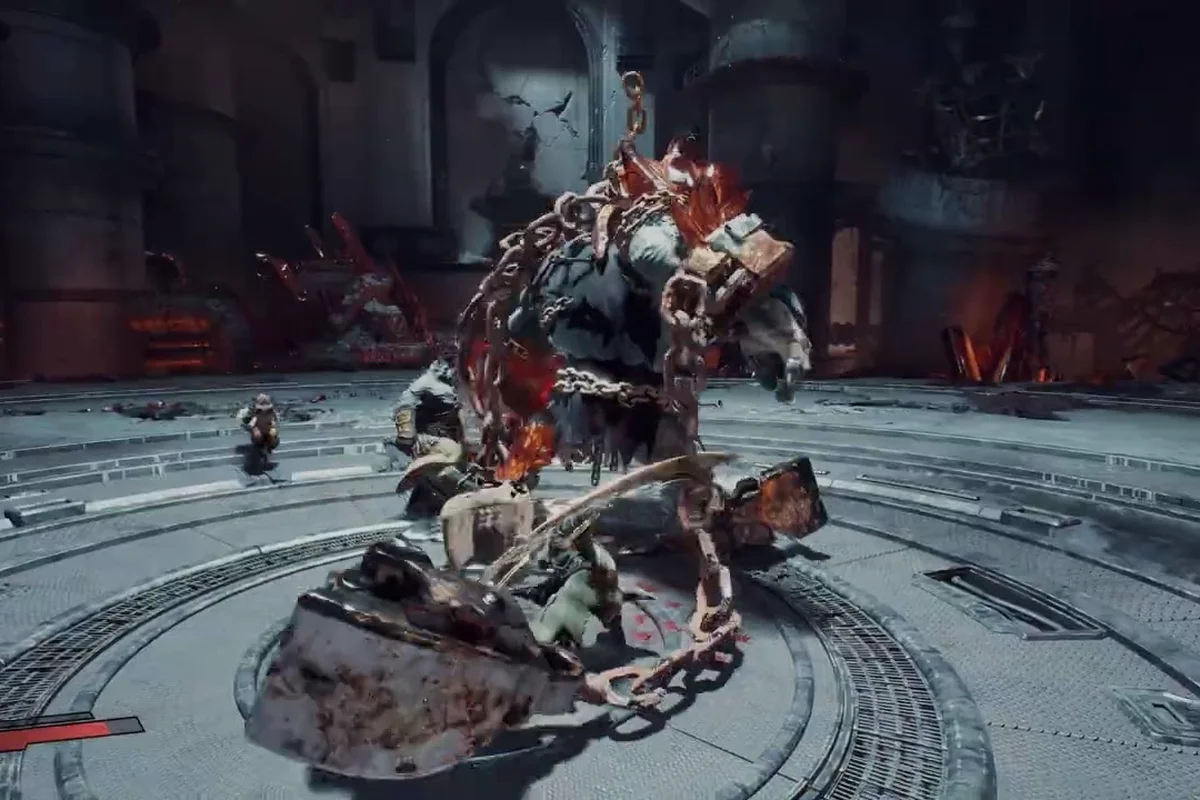
Reading war machine attack telegraphs before the second hit lands is the single biggest difference between a clear and a wipe, and Zoopunk boss patterns reward exactly that kind of disciplined read. If you have been bouncing off mid-campaign elite encounters without understanding why, the gap is almost never raw damage — it is pattern literacy.
Zoopunk's combat is built on a co-op PVE frame tuned for two to four players, with raid-style group boss encounters anchored on multi-stage mechanoid silhouettes. The gamescom ONL 2026 trailer already confirms the design intent: colossal war machines tower over the squad, with glowing core weak points flashing during phase transitions, and armoured plates that visibly crack open to expose inner machinery. Those are not set-dressing — they are readable pattern cues, the same language Devil May Cry veterans and God of War raid-club regulars have been parsing for years, and they map directly to the strategy content you can build before launch.
This guide breaks down the Zoopunk boss patterns you can pre-learn from trailer evidence, the phase loop logic that seems to govern every tier of the mechanical empire's hierarchy, and the resource economy (healing, defense, crit stacking) that turns a panicked scramble into a clean run.
Reading the Boss Tier Hierarchy Before You Fight
Zoopunk's mechanical empire follows a visible rank structure, and understanding that rank structure is the first step to predicting what pattern language each encounter will speak. The lore pages on IGN's Zoopunk hub describe the antagonist faction as a hierarchy ranging from mass-produced debris units — the fodder-tier grinds — up through self-aware command constructs that sit at the top of the threat ladder.
That lore maps cleanly onto the boss pattern tiers you can expect in combat. Debris units telegraph through volume and AoE rings rather than complexity, while apex-tier war machines lean on multi-stage phases with explicit weak-point windows. Mid-campaign elite mini-bosses will sit in the middle of that curve — the practice space where you learn the game's core pattern vocabulary before the real tests arrive.
Expected Tier Breakdown for Zoopunk Boss Encounters
| Tier | Role in Run | Pattern Complexity | Telegraph Speed | Recommended Prep |
|---|---|---|---|---|
| Debris Unit | Early-game filler | Single combo, short | Fast windups, low damage | Learn dodge i-frames |
| Pack Leader | Mid-campaign mini-boss | 2-phase loop, adds | Medium windups, AoE rings | Stack stagger on break |
| Elite Construct | Late-campaign gate | 3-phase loop, enrage | Slow windups, core expose | Coordinate tag burst |
| Command Construct | Apex / finale | Multi-phase, scripted | Layered windups, punish windows | Full squad role split |
Reading tier by tier is more useful than memorizing every attack. Once you recognise that a given enemy belongs to the Pack Leader archetype, the broad shape of the fight becomes predictable even before the specific boss name is revealed.
Why the Visual Language Matters
The art-direction tells you what type of pattern you are facing before the first hit lands. Trailer footage consistently shows three visual tells: glowing seams on armoured shells that brighten before they crack, oversized weapon limbs that wind up across multiple frames, and silhouette changes between phases — arms retract, torsos open, cores glow brighter. These are the game's pattern telegraph system, and they are deliberate, not accidental. The art team is communicating "dodge now" and "break window open" through the screen, not through damage numbers alone.
The Phase Loop Logic Behind Every War Machine
The phase loop is the structural backbone of Zoopunk boss patterns, and it works the same way regardless of which tier you are fighting. Every encounter in the campaign seems designed around a repeating template: armoured intro, transition trigger, exposed-core window, enrage escalation, repeat. Recognising that template lets you plan resource dumps and squad swaps with far more confidence than a pure reaction play style ever could.
The Three-Stage Pattern Template
The pattern template most clearly visible in the announcement trailer breaks down into three repeating stages, and understanding each one is essential for executing Zoopunk boss phases with any consistency.
| Stage | Visual Cue | Player Objective | Squad Priority |
|---|---|---|---|
| Armour Phase | Outer shell intact, plate glow dim | Build stagger meter, bait punish windows | All-in stagger damage |
| Transition | Plates crack, core flashes once | Stop damage, reposition for expose | Resource regen, heal window |
| Core Expose | Core fully visible, glow critical | Burst window, maximum DPS | Tag burst + crit stacking |
The armoured phase is where most squads waste their cooldowns. Because the outer shell reduces incoming damage, dumping ultimates and tag-burst windows into an armoured target is inefficient unless you are specifically feeding the stagger meter. The transition stage is the heal and re-position beat — the safest two seconds of the entire fight, and the moment the Zoopunk healing guide economy wants you to top off rather than greed. The core expose is the only true DPS check, and the moment to chain every cooldown your squad has.
Enrage Escalation and Phase Skipping
Enrage is the late-fight pressure valve, and it changes the pattern loop rather than restarting it. Trailer evidence suggests enrage triggers when the squad fails to break a phase within a soft timer, at which point the boss skips to its most dangerous attack set and begins cycling faster. This is the moment where a "we'll just push through it" mindset collapses, because the pattern window itself is the resource. Phase-skipping punishes squads that ignored the stagger meter in armour, and rewards squads that respected the break window.
Damage Numbers, Crit Windows, and the Burst Math
Damage numbers in Zoopunk are not the only feedback channel, but they are the most legible one, and the crit guide layer of your build directly controls how much damage you extract from each phase window. A clean run is almost always a crit-stacked run, because the core expose window is short enough that flat damage cannot keep pace with the enrage timer.
Reading the Numbers Without Panicking
The trailer does not display exact Zoopunk damage numbers, but community testing from prior TiGames projects suggests the team uses a four-stat envelope: base damage, crit multiplier, stagger contribution, and break-window bonus. Crit builds lean into a 1.5x to 2x multiplier during the core expose, while stagger-focused builds feed the break meter to extend that window by a few extra seconds. Both are valid, and the math comes down to whether your squad can reach the break threshold before the enrage soft-timer expires.
Crit Stacking for the Core Expose
| Build Role | Primary Stat | Secondary Stat | Burst Window Output |
|---|---|---|---|
| Crit DPS | Crit Rate | Crit Damage | Highest single-window burst |
| Stagger Anchor | Stagger Power | Break Window | Slowest clear, safest run |
| Hybrid Carry | Crit Rate | Stagger Power | Balanced, squad-flexible |
| Support Carry | Healing | Defense | Lowest damage, longest survivability |
Crit-stacking is mechanically strongest in coordinated squads, because the tag-burst window multiplies crit chance on the assisting hero. Solo players will get less out of a pure crit build and more out of a hybrid carry, since they cannot lean on a teammate to set up the burst chain. This is one of the Zoopunk boss patterns that the community data already points to: solo runs play a different damage math than squad runs, even on the same encounter.
Defense, Healing, and the Survival Economy
Survival in Zoopunk boss encounters is governed by an economy, not a tank threshold. Every heal spent and every defensive cooldown burned is a resource you cannot recover inside the phase window, so the squads that clear cleanly are the squads that plan the spend before the first hit lands. Defense and healing are two halves of the same budget, and the Zoopunk defense guide and Zoopunk healing guide angles are best treated as a single decision tree.
The Defense-Heal Tradeoff
| Player State | Default Action | Reasoning |
|---|---|---|
| Full HP, mid-phase | Hold cooldowns, build stagger | Spend budget on the break, not the chip |
| Mid HP, transition window | Heal, regen stamina | Transition is the safe beat, use it |
| Low HP, enrage active | Defense cooldown, retreat | Survival outranks damage in enrage |
| One-shot range, core expose | Commit, burst through | Heals cannot save you, damage can |
The single most common mistake new squads make is spending the healing cooldown during the armour phase, when chip damage is recoverable through regen. By the time the core expose window opens, the heal is on cooldown and the squad enters the burst phase already chipped. Flipping that — hold heals through armour, spend them in transition — extends the effective HP pool of the entire squad by roughly one full phase cycle.
Stagger as a Defensive Layer
Stagger is more than a damage stat. Breaking a boss mid-combo cancels the next attack in its pattern queue, which is functionally a defensive cooldown you can buy with stagger power. Squads that respect the stagger meter effectively carry one extra revive potion per phase, because the cancelled attack is damage the boss simply does not deal. This is the hidden economy behind a clean run: stagger spent well is healing never needed.
Squad Roles and the Tag-Burst Window
The tag-burst window is the central co-op mechanic, and it is the most reliable way to translate Zoopunk boss patterns into a clear. Every tag-in during the core expose stacks a damage bonus on the assisting hero, and the squad that times its tag-bursts into the break window is the squad that skips enrage entirely.
A Sample Phase-Loop Plan for a Two-Hero Squad
A two-hero squad plays a tighter version of the pattern template, and the rotation below is the cleanest way to handle a generic three-phase war machine.
| Phase Step | Hero A Action | Hero B Action | Squad Focus |
|---|---|---|---|
| Armour | Stagger combo chain | Bait punish, dodge AoE | Feed break meter |
| Transition | Retreat, regen stamina | Heal if below 50% HP | Reset positioning |
| Core Expose | Tag-in for burst | Combo chain, no swap | Stack crit windows |
| Enrage | Defense cooldown | Commit burst rotation | Race the timer |
Two-hero squads should plan their first tag-burst on the second core expose rather than the first, because the first break window often does not have enough stagger banked to extend the window long enough for a full crit rotation. The second break is where the math works out, and the enrage timer still has cushion left to absorb a partial clear.
Coordinating Burst With Mechanoid Type
Different mechanoid types in the mechanical empire hierarchy will have different core-expose durations, and coordinating your burst window to the specific type is where the real optimisation lives. Apex-tier command constructs appear to have shorter expose windows but larger crit windows — a design choice that rewards crit-stacked squads over stagger-anchored ones. Mid-tier pack leaders show the inverse pattern: longer expose, smaller crit bonus, which fits a stagger-anchored build far better than a crit carry.
Frequently Asked Questions
How do I read Zoopunk boss patterns before the wiki is updated?
The fastest pre-launch trick is to watch the trailer frame-by-frame and look for three tells: glowing seams on armoured shells, oversized windup frames on weapon limbs, and silhouette changes between phases. The art team telegraphs dodge windows, break windows, and phase transitions through visual language, so the patterns are readable from a paused trailer long before the wiki catches up.
What is the safest way to learn Zoopunk boss phases as a solo player?
Solo players should treat the phase loop as a four-beat rhythm rather than a five-beat one, because they cannot rely on a teammate to cover the transition window. Focus on stagger first, defense second, and crit-burst third; pure damage builds will lose the enrace race before they break the armour.
Which stat should I prioritise for the Zoopunk crit guide during core expose?
Crit rate first, crit damage second, stagger power as a hybrid tiebreaker during the core expose window. Flat damage cannot outpace the enrage timer, so the squad converting the most hits into crit hits skips enrage entirely. Pair the crit stack with a tag-burst assist to multiply bonuses across both heroes.
When is the best moment to spend heals according to the Zoopunk healing guide?
Spend heals during the transition stage of the phase loop, never during armour or core-expose beats. Chip damage taken through armour phases is recoverable via passive regen, so healing there wastes the cooldown. Holding the heal for transition keeps the squad topped off entering the next armour phase, effectively extending your HP pool by roughly one full phase cycle.
How do I tell whether a boss belongs to the stagger-anchor or crit-carry pattern type?
Watch the size and duration of the core expose. A short, bright window with a large crit bonus points to an apex-tier command construct, which rewards crit-stacked squads. A long, dim window with extra stagger contribution points to a mid-tier pack leader, which rewards stagger-anchored squads. The visual length of the expose is the cleanest pre-fight read you will get.