
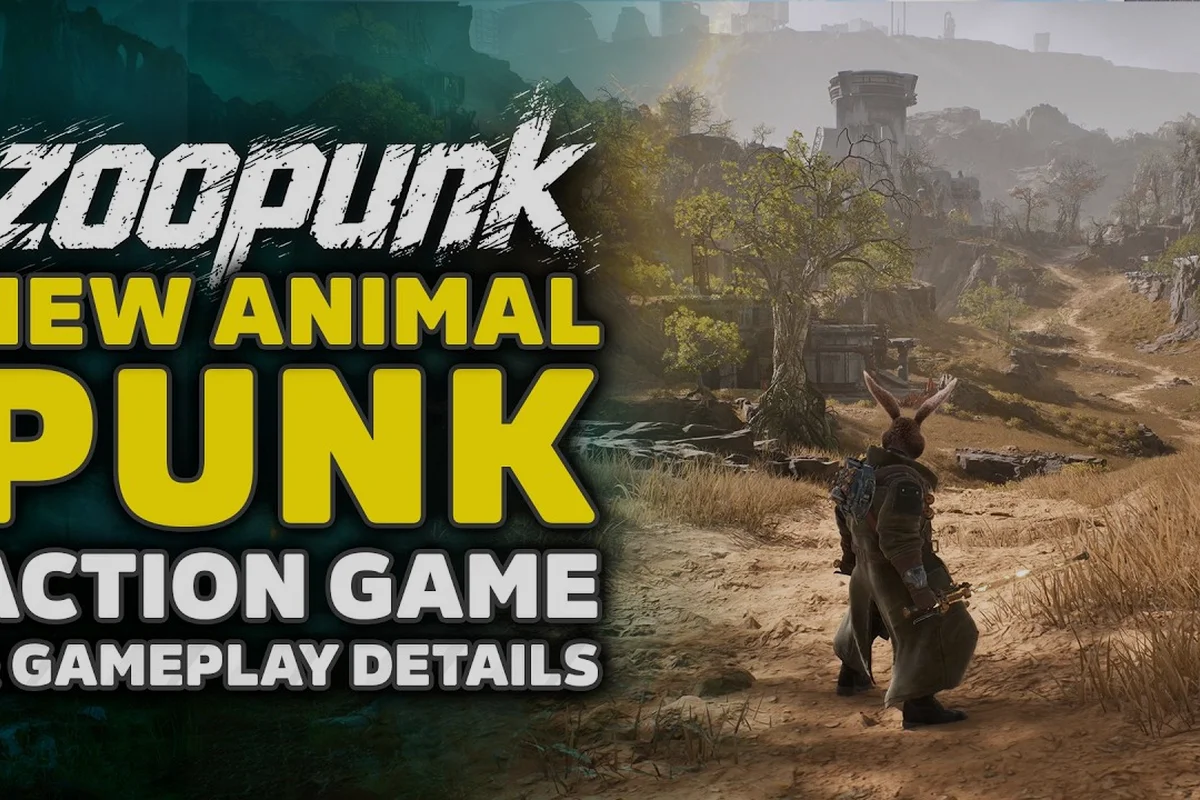
The first hours of Zoopunk decide whether your squad survives the Torch War or burns through its Fire Seed stash by chapter two. This Zoopunk early game guide is built around the mechanics the official channels have already shown, including the gamescom ONL 2026 trailer and TiGames' studio pillars page, so you can plan hero rotation, upgrades, and co-op habits before the Mechanoids close in. Drop in, pick a hero, and use the checklist below to turn the prologue into a clean ramp instead of a scramble.
What the Zoopunk Opening Hours Actually Demand
The early game is not a free roam, and it is not a pure tutorial. According to the gamescom ONL 2026 trailer, Zoopunk opens on Rayton's solo fight escalating as Braton and Trixie drop in from above with iron fists and flying tech. That is your first signal: the game teaches the tag-team assist flow as the baseline, not as a late unlock. The first two to three hours are a guided ramp that mixes combat lessons, traversal, and a single squad formation, while a later Zoopunk progression guide would focus on build theory.
The First Two Hours: Mission Flow You Can Plan Around
The prologue is structured, not open. Based on the official short "Give It Back." - Rayton's Fight Starts Now, the opening hours are narrative-led and teach whip basics, dodge timing, and squad call-ins before open progression begins. You will spend most of the prologue in Rayton's kit because his twin whips teach spacing, the most transferable skill in the game.
The official short "Rayton's Whip Fury: One Rabbit, No Limits!" shows whip reach, mobility, and combo flow that new players can expect from the opening hours of the rabbit veteran's kit. Use that as a benchmark. If your Rayton cannot reach a charging patrol with one whip extension by the end of the prologue, you are still learning inputs, not the game.
Resources You Will and Will Not Have
Fire Seed is the only confirmed progression currency, and the studio pillars on the official Zoopunk page frame anthromorph upgrade systems as a core early pillar. Spend on what multiplies squad uptime first (revives, stagger extensions), not on raw damage modifiers. The first hours are tight on resources, and the economy is built around small wins stacking, which is why the rest of this Zoopunk difficulty guide leans into squad habits over gear chasing.
| Early Resource | Where It Comes From | Spend Priority in First 3 Hours |
|---|---|---|
| Fire Seed | Mechanoid drops, story pickups | Hero passives > gear > cosmetics |
| Stamina Caches | Hidden corners, exploration | Save for boss windows |
| Health Kits | Vendor, exploration | 2-3 kits in reserve always |
| Squad Assist Charges | Co-op assists, tag chains | Use on staggers, not health |
Controls and Controller Settings Worth Setting Before Chapter 1
The opening chapter punishes players who leave defaults alone. A Zoopunk controls guide that ignores stick sensitivity, deadzone, and swap-button layout is a recipe for a stalled run, because tag-team assists are only valuable when your thumb can find the swap input without looking. Treat the settings pass as a 10-minute speed boost that compounds across every fight in the first 8 hours.
Sensitivity, Deadzone, and Camera
Aim acceleration should be moderate, not maxed, because Rayton's whip range depends on camera tracking, not flick speed. A high deadzone hides small stick drift but makes pivot inputs feel late; a low deadzone exposes drift but rewards clean inputs. Test the following three presets in the tutorial sparring ring before you commit.
| Setting | Preset A (Default) | Preset B (Comfort) | Preset C (Precise) |
|---|---|---|---|
| Stick Sensitivity | 5/10 | 6/10 | 7/10 |
| Aim Acceleration | 1.0x | 1.2x | 1.0x |
| Deadzone (Left) | 0.20 | 0.15 | 0.10 |
| Deadzone (Right) | 0.18 | 0.12 | 0.08 |
| Camera Distance | Mid | Far | Far |
Preset B is the recommended starting point, with a tighter deadzone that still masks minor stick wear on older controllers. Preset C is for players who have already cleared a similar action game and can recover from oversteer. Both outperform the default in tight Mechanoid corridors.
Button Mapping and Swap Layout
Tag-team swap is the most important input. The default usually binds it to a face button, but most controller players report faster swaps when the input sits on a shoulder or trigger. Bind dodge to a button you can press without lifting your thumb off the stick, and bind heavy attack separately from jump so a panic jump cannot cancel a combo opener.
If you want a deeper pass on input tuning, the best settings guide covers platform-specific advice for PC, PlayStation, and Xbox. Pull it up after your first run, not before, because you will not know which muscle memory is breaking until you feel it in a real fight.
Display, Audio, and the Cues You Actually Need
Audio carries stagger and break cues faster than visual tells. Keep music volume around 70% and effects around 90% during the first hours, so Mechanoid wind-up audio does not get buried under the soundtrack. Subtitles should be on; the Mechanoid grunt patterns differ by tier, and the early chapters do not explain them. A small accessibility-style investment in your Zoopunk controller settings pays off the first time a War Machine telegraphs an unblockable from off-screen.
Hero Rotation, Upgrade Order, and the Squad Loop
The trio is your only squad for the first 2-3 chapters. According to the gamescom ONL 2026 trailer, the resistance operates on multiple fronts, and Braton and Trixie drop in to anchor melee and ranged roles respectively. That maps to a clear rotation: Rayton for spacing and add control, Braton for stagger and break windows, Trixie for aerial punish and tech support. Build the squad around role coverage, not raw damage, which is the foundational idea in any honest Zoopunk progression guide.
The First Three Heroes, Ranked by Early Value
Rayton is the safest opener because his whips teach spacing. Braton is the best second pick because his fists generate stagger pressure, which compounds the value of every Rayton combo that follows. Trixie is the wildcard; she is the highest skill floor of the three, but her aerial tech support lets a single player carry fights a 2-hero squad would otherwise lose. The table below ranks them for the first hours specifically, not for endgame.
| Hero | Best Early Role | Skill Floor | Carry Potential | Best Pair With |
|---|---|---|---|---|
| Rayton | Ranged anchor, add clear | Low | Medium | Braton, Trixie |
| Braton | Frontline stagger, break bait | Medium | High | Rayton |
| Trixie | Aerial punish, tech support | High | Highest | Rayton |
If you play solo, stay on Rayton until you have the dodge rhythm down, then rotate in Braton for stagger-heavy fights. If you are in a 3-player squad, lock Rayton on adds, Braton on the boss, and Trixie on cleanup until chapter 3.
Upgrade Order: What to Spend Fire Seed On First
The studio pillars page lists Wasteland traversal, first Mechanoid encounters, and anthromorph upgrade systems as the expected opening checklist, which implies upgrade gates are part of the early loop, not a postgame bonus. Spend in this order during the first 6 hours:
-
Hero passive tier 1 for the hero you main. Always cheapest, always highest ROI.
-
Squad-wide revive efficiency. Cuts downtime on every wipe attempt.
-
Heavy attack stagger extension. Multiplies the value of your existing combos.
-
Health kit carry +1. Doubles your safety net for boss attempts.
-
Gear tier 1 for the second hero you actually rotate to. Skip cosmetic upgrades entirely.
Hold off on ultimate damage upgrades until chapter 4. The first hours of any zoopunk early game guide focus on uptime, not burst, so every Fire Seed should go into either cooldown reduction on your primary or max HP + armor so trash waves in chapters 1-3 stop one-shotting you. A typical pre-chapter-4 build spends roughly 70% of seeds on survivability nodes and only the remaining 30% on a single low-tier ultimate; dumping seeds into raw ultimate damage before then feels good for one finisher but leaves you too squishy to reach finisher range. Once chapter 4 opens the tier-3 upgrade tree, you can respec and re-pump your ultimate without losing the uptime foundation.
Squad Habits That Carry Through the War
Three habits are worth building before chapter 2, because they survive every roster change later. First, call your swaps with a ping or voice line, even in solo, because the input becomes automatic. Second, save one stamina cache per boss attempt; do not spend on trash. Third, revive on stagger, not on health, because a staggered ally gets back into the fight with full momentum, while a revived ally at low HP will just stagger again.
If you want a deeper breakdown of how Rayton, Braton, and Trixie cover each other in practice, the combat basics guide maps the swap chain in detail. Use it alongside this Zoopunk difficulty guide when you hit a wall on a boss, not before, so the rotation logic has time to bake in.
Difficulty Tuning, Mistakes to Avoid, and the Pre-Boss Checklist
Difficulty in Zoopunk is not a single slider. It is a combination of squad composition, upgrade order, and resource discipline, which is why a Zoopunk difficulty guide is more useful than a single setting. The opening chapters are forgiving on Standard and punishing on Hard, but the gap closes fast once you start skipping upgrades, because the Mechanoid roster scales on a fixed curve regardless of your chosen preset.
Common First-Hours Mistakes That Cascade
-
Spreading Fire Seed across all three heroes. Each hero gets less than one passive tier, and no single hero feels strong.
-
Hoarding stamina caches for a "perfect run." Caches are per-attempt, not per-run; you will burn them on the boss you actually fight, not the one you imagine.
-
Skipping exploration in the prologue. The first zones hide the most caches per minute because the devs expect you to look.
-
Ignoring stagger audio cues. Break windows are the difference between a 4-minute boss and a 12-minute boss, and audio is the earliest tell.
-
Refusing to swap heroes. Solo players who never rotate never learn stagger setup, and stagger setup is the only consistent damage amplifier in the early game.
Pre-Boss Checklist (Run This Every Time)
| Step | Action | Why It Matters |
|---|---|---|
| 1 | Spend unused Fire Seed on hero passive | Banked currency does not help mid-fight |
| 2 | Top off health kits to 3 | Boss phases often chain two damage spikes |
| 3 | Confirm one stamina cache in reserve | Burst windows appear late in phase 2 |
| 4 | Ping the boss break bar with squad | Stagger rotation has to be agreed, not improvised |
| 5 | Save one assist charge | Trixie's aerial punish shines on first break |
This checklist works on every boss in chapters 1-3 because the run resets to a fixed loadout screen rather than a checkpoint, so your pre-fight Stamina potion, repaired weapon durability, and two revives slot in identically before the Warden, the Mire Hag, and the Furnace Foreman alike. Once you beat your first boss with it, the muscle memory carries through the rest of the war — the same dodge-cancel timing you drill against the Warden's overhead swing also cancels the Mire Hag's pull telegraph, which is why the community treats that opening clear as the real tutorial wall of the zoopunk early game guide.
When to Lean on Co-op and When to Go Solo
Co-op in Zoopunk scales Mechanoid HP and adds, but it also doubles stagger uptime and doubles revive availability. The early chapters are tuned around a 2-player baseline, which means solo runs feel 20-30% tougher, not twice as hard. If you are struggling on a chapter boss solo, the answer is rarely "grind more," it is almost always "swap hero to cover the stagger role you are missing." That is the core insight behind every working Zoopunk early game guide: optimize the loop, not the grind.
For a broader look at how the first hours connect to midgame progression, the game guide lays out what to expect across the full opening arc. Bookmark it for after chapter 2, when the resource economy starts to bite.
Frequently Asked Questions
What is the best hero to start with in Zoopunk?
Rayton is the best starter hero because his twin whips teach spacing and add control, which are the two skills that translate across the entire roster. Lock him in for the prologue, then add Braton for stagger pressure once the rotation opens up.
How long is the Zoopunk prologue?
Rayton's solo opening runs roughly 45-60 minutes, covering whip basics, dodge timing, and the narrative that builds up to Braton and Trixie's tag-team drop-in. Add another 30-45 minutes for the squad rotation tutorial once they arrive, putting the full prologue near two hours before open Chapter 1 progression.
Should I change the default controls before chapter 1?
Yes. Tighten the right-stick deadzone to 0.10-0.15 and bind tag-team swap to a shoulder input, because defaults hide the swap behind a face-button press that breaks combo flow. The change is small, but it compounds across every Mechanoid fight in the first 8 hours.
What is the smartest way to spend Fire Seed early?
Prioritize hero passive upgrades first, then squad-wide revive efficiency, then heavy attack stagger extension. Hold off on cosmetics and ultimate damage mods until chapter 4, since tier-1 passives like Iron Shell — 40% damage reduction for 3 seconds after a revive — outvalue every ultimate mod for the first three chapters.
Can I beat the early bosses solo without grinding?
Yes, if you run the pre-boss checklist every attempt and swap to the hero that covers your weakest role. The first bosses are tuned around a 2-player baseline, so a solo player with clean stagger rotation can clear them without any extra grinding.